1.1 Overview of the Device
This Full HD 1080p Car DVR is a high-quality dashboard camera designed to capture crisp video and photos while driving, ensuring clear evidence in case of incidents.
1.2 Importance of the User Manual
The user manual is essential for understanding device operation, installation, and troubleshooting, ensuring optimal performance and safety while using the DVR in your vehicle.
The Full HD 1080p Car DVR is a compact dashboard camera designed to record high-quality video and capture photos while driving. It features a 1080p resolution, wide dynamic range (WDR), and motion detection for enhanced image quality and automatic recording. The device includes a 140-degree lens, GPS tracking, and night vision capabilities, ensuring clear footage in various lighting conditions. It supports loop recording and memory management for efficient storage use. The DVR also comes with optional accessories like a rear camera for added coverage.
The user manual is crucial for understanding the Full HD 1080p Car DVR’s features, installation, and operation. It provides detailed instructions for setting up the device, troubleshooting common issues, and maximizing its functionality. By following the manual, users can ensure proper installation, configure settings accurately, and utilize advanced features like GPS, night vision, and motion detection effectively, enhancing both safety and recording quality while driving.
Unboxing and Packaging Contents
The package includes a Full HD 1080p Car DVR, car charger, suction cup holder, user manual, and optional rearview camera with a 6-meter cable for enhanced coverage.
2.1 List of Items Included
The packaging contains a Full HD 1080p Car DVR, car charger, suction cup holder, user manual, and optional rearview camera with a 6-meter cable. Additional items include a warranty card and consumer information leaflet, ensuring all necessary components for installation and operation are provided right out of the box.
2.2 Optional Accessories
Optional accessories include a rearview camera with a 6-meter cable, GPS tracker, and additional storage cards. These enhance functionality, improving rear visibility, enabling GPS tracking, and expanding memory for extended recording capabilities. They are available separately to customize the DVR to meet specific user needs and preferences for enhanced performance and convenience while driving.
Key Features of the Full HD 1080p Car DVR
This DVR offers 1080p Full HD video recording, a 140-degree wide-angle lens, WDR for enhanced low-light clarity, and built-in GPS for precise location tracking, ensuring superior performance and reliability on the road.
3.1 Video Resolution and Quality
The Full HD 1080p Car DVR captures video at 1920×1080 pixels, delivering sharp and detailed footage. Its advanced sensor ensures vibrant colors and clarity, even in low-light conditions. The wide dynamic range (WDR) balances brightness and shadows, enhancing overall video quality. This makes it ideal for capturing clear evidence on the road, whether day or night, ensuring every detail is preserved.
3.2 Wide Dynamic Range (WDR) Function
The Wide Dynamic Range (WDR) function enhances video quality by balancing bright and dark areas in the scene. This ensures clearer details in both high-contrast lighting conditions, such as sunny days or nighttime driving. WDR reduces overexposure in bright areas and improves visibility in shadows, providing a more accurate representation of the road environment. This feature is crucial for capturing sharp, detailed footage in various lighting scenarios, making it ideal for evidence recording.
3.4 Motion Detection and Auto-Recording
The Motion Detection feature automatically starts recording when it detects movement near your vehicle, even in standby mode. This ensures that any unexpected events, such as a collision or vandalism, are captured without manual intervention. The auto-recording function saves these clips to the memory card, providing peace of mind while your car is parked or unattended. This feature is customizable to suit your specific needs and preferences for 24/7 monitoring and security.

Physical Structure and Buttons
4.1 Front and Rear Camera Overview
The device features a compact, lightweight design with a high-sensitivity sensor for clear imagery. The front camera offers a wide-angle lens, while the rear camera provides additional coverage.
4.2 Button Layout and Functions
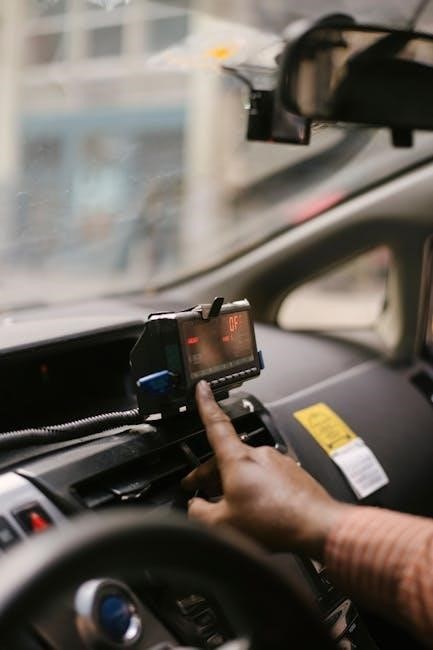
The DVR includes a Power button, OK button, and directional buttons for menu navigation. The buttons are intuitively placed for easy access and operation while driving.
The front camera features a 140-degree wide-angle lens, capturing clear, distortion-free video in 1080p Full HD. The rear camera, with its 120-degree angle, ensures comprehensive coverage of the vehicle’s surroundings. Both cameras are equipped with night vision technology, enhancing low-light recording capabilities for improved visibility and detail, making them ideal for 24/7 monitoring and ensuring safety on the road.
The DVR features a intuitive button layout with Power, OK, Mode, and Lock buttons. The Power button turns the device on/off, while the OK button confirms selections. The Mode button switches between video and photo modes, and the Lock button secures important files. These buttons provide easy navigation and control, ensuring seamless operation of the DVR’s core functions while driving or reviewing footage.

Installation Guide
Mount the DVR on your windshield using the suction cup, ensuring a clear view for the camera lens. Connect the rearview camera and power supply, securing all cables neatly for safe and proper operation.
5.1 Mounting the DVR on the Windshield
Mount the DVR on your windshield using the provided suction cup. Ensure the surface is clean and dry for a secure hold. Press the suction cup firmly until it adheres, then push the pressure valve down to create a vacuum seal. Adjust the DVR to ensure the camera lens has a clear, unobstructed view of the road. Verify the device is level and securely attached before driving.
5.2 Connecting the Rear View Camera
Connect the rear view camera to the DVR using the provided 6-meter cable. Ensure the cable is securely attached to both the DVR and the rear camera. Route the cable neatly inside your vehicle to avoid obstructions. Connect the power supply of the rear camera to the DVR or your car’s power system. Adjust the rear camera’s angle for optimal visibility and ensure it is firmly mounted to your vehicle’s rear window or desired location.
5.3 Power Supply and Wiring
Connect the DVR to your car’s power supply using the provided car charger. Insert the charger into the cigarette lighter socket and attach the DVR’s power cable. Ensure the wiring is securely routed to avoid interference with vehicle controls. For the rear camera, connect its power supply to the DVR or your vehicle’s electrical system. Properly secure all cables to prevent damage and ensure safe installation. If hardwiring, consult a professional to avoid electrical system damage.
Basic Operations and Modes
Power on the DVR using the power button, which also starts video recording. Switch to photo mode by pressing the mode button, capturing still images easily.
6.1 Powering On/Off and Boot Process
To power on the DVR, press the Power button. The device will initialize and automatically enter video recording mode. Upon startup, the screen displays the logo, followed by the main menu. Use the Power button again to turn it off. Ensure the DVR is connected to a power source, like a car charger, for consistent operation. The boot process is quick, enabling immediate recording upon activation.
6.2 Switching Between Video and Photo Modes
Press the Mode button to toggle between video and photo modes; In video mode, the DVR records continuously, while photo mode captures still images. Use the OK button to confirm mode selection. The screen will display the current mode, ensuring easy navigation. Switching modes allows you to adapt the DVR’s functionality to your needs, whether monitoring driving or capturing scenic views. This feature enhances versatility for various recording scenarios.
6.3 Navigating the Menu System
Use the Up and Down buttons to scroll through menu options. Press OK to select an option and Back to return to the previous screen. The menu provides access to settings like video quality, motion detection, and loop recording. Navigate through options to customize your recording preferences. The menu system is intuitive, allowing users to easily adjust settings for optimal performance. Press Power or Back to exit the menu and return to the main screen.

Advanced Features and Settings
The device offers advanced features like GPS tracking, night vision, and memory management, enhancing functionality and user experience while ensuring high-quality recording and data security.
7.1 GPS Functionality and Tracking
The GPS functionality enables precise location tracking, embedding coordinates and speed data into recorded footage. This feature aids in route mapping and provides evidence of your vehicle’s position during incidents, enhancing security and accountability while driving. The GPS tracker integrates seamlessly with the DVR, ensuring accurate and reliable data capture for later review. This advanced feature is particularly useful for monitoring driving routes and maintaining a record of journeys, offering both practical and safety benefits for users. The GPS function can be activated through the device’s menu system, allowing you to customize tracking settings according to your preferences. Additionally, the GPS data can be synchronized with compatible software, providing detailed trip analysis and further enhancing the functionality of your Full HD 1080p Car DVR.
7.2 Night Vision and Low-Light Recording
The DVR features enhanced night vision capabilities, capturing clear video in low-light conditions. A built-in sensor automatically adjusts exposure, ensuring vivid imagery even at night. This function is crucial for continuous monitoring and incident recording in dark environments, providing peace of mind and reliable evidence when natural light is scarce. The night vision mode minimizes glare and enhances visibility, making it an essential feature for 24/7 vehicle surveillance.
7.3 Memory Management and Loop Recording
The DVR features loop recording, which automatically overwrites the oldest files when memory is full, ensuring continuous recording. Users can set video clip durations (3, 5, or 10 minutes). The device supports memory cards up to 128GB, and files are organized by date and time. For important clips, a lock function prevents overwriting. Regular formatting of the memory card is recommended to maintain performance and prevent data corruption, ensuring reliable storage of your recordings.
Connecting to Smartphones and PCs
This section explains how to connect your Full HD 1080p Car DVR to smartphones and PCs via Wi-Fi or USB, enabling easy file transfers and app integration for convenient management.
8.1 Wi-Fi Connectivity and App Integration
To connect your Full HD 1080p Car DVR to your smartphone, enable Wi-Fi in the device settings and link it to your phone’s Wi-Fi network. Download the dedicated app, available for both iOS and Android, to access live footage, transfer files, and adjust settings remotely. The app also allows real-time video viewing, ensuring convenient management of your recordings on the go.
8.2 Transferring Files to a Computer
Connect the DVR to your computer using a USB cable or by inserting the microSD card into a card reader. Once connected, access the device’s storage folder to view and transfer recorded videos and photos. Ensure the computer recognizes the device or card before transferring. Always format the microSD card in the DVR before use to maintain compatibility and optimal performance.
Troubleshooting Common Issues
Common issues include device not turning on, poor video quality, or connectivity problems. Check power supply, memory card formatting, and restart the DVR. Consult the manual for solutions or contact customer support if issues persist.
9.1 Device Not Turning On
If the DVR fails to power on, ensure the car charger is properly connected and the battery is charged. Check for loose connections or damaged cables. Verify the power button is functioning correctly. If issues persist, reset the device or contact customer support for further assistance, as indicated in the user manual.
9.2 Video Quality Problems
If experiencing blurry or low-quality video, ensure the lens is clean and free from obstructions. Check the DVR settings to confirm resolution is set to 1080p. Verify the SD card is compatible and formatted correctly. If issues persist, restart the device or reset to factory settings. For severe problems, contact customer support for further troubleshooting or potential hardware inspection, as outlined in the user manual.
9.3 Connectivity Issues
If experiencing connectivity problems with your smartphone or PC, ensure the DVR’s Wi-Fi is enabled and properly paired. Restart both devices and check the app version is up-to-date. Verify the DVR’s firmware is current, as outdated versions may cause compatibility issues. Reset the DVR to factory settings if connectivity persists. Consult the user manual or contact support for further assistance or potential hardware diagnostics. Ensure all cables are securely connected and functioning correctly.
Maintenance and Care
Regularly clean the lens and screen to ensure optimal recording quality. Update firmware periodically for improved performance and new features. Store the device in a dry, cool place to prevent damage and extend lifespan.
10.1 Cleaning the Lens and Screen
Regular cleaning of the lens and screen is crucial for maintaining image clarity. Use a soft, dry microfiber cloth to gently wipe away dirt, smudges, or fingerprints. For stubborn marks, lightly dampen the cloth with distilled water or a lens cleaning solution. Avoid using circular motions, as they may scratch the surface. Never apply pressure or use harsh chemicals, which could damage the lens or screen coating. Clean both the front and rear cameras to ensure optimal recording quality.
10.2 Updating Firmware
Regularly updating your Full HD 1080p Car DVR’s firmware ensures improved performance, bug fixes, and new features. Visit the manufacturer’s official website to download the latest firmware version. Use a microSD card to transfer the update file to the DVR. Insert the card, navigate to the settings menu, and select the firmware update option. Follow on-screen instructions carefully. Do not turn off the device during the update process to avoid potential damage or system corruption. Always verify the update source for security.
10.3 Storing the Device
Store your Full HD 1080p Car DVR in a cool, dry place to prevent damage from moisture and extreme temperatures. Avoid exposing it to direct sunlight or humidity. Use a protective case to shield the device from dust and physical damage. When not in use, disconnect the battery to prevent draining. Ensure the microSD card is removed and stored separately. Handle the DVR with care to maintain its functionality and longevity.
Legal and Safety Considerations
Adhere to local privacy laws when recording to avoid legal consequences. Avoid distractions while driving, as the DVR is for emergency recording, not entertainment.
Responsible use ensures safety and compliance with regulations. Always inform passengers and respect privacy when recording in or around your vehicle.
11.1 Privacy Laws and Recording
Always adhere to local privacy laws when using the DVR. Recording without consent, especially of sensitive information like faces or vehicle plates, may violate legal regulations. Ensure you respect privacy rights and only capture necessary footage for safety purposes. Inform passengers and adjust camera angles to avoid recording unrelated personal details, maintaining ethical standards while using the device.
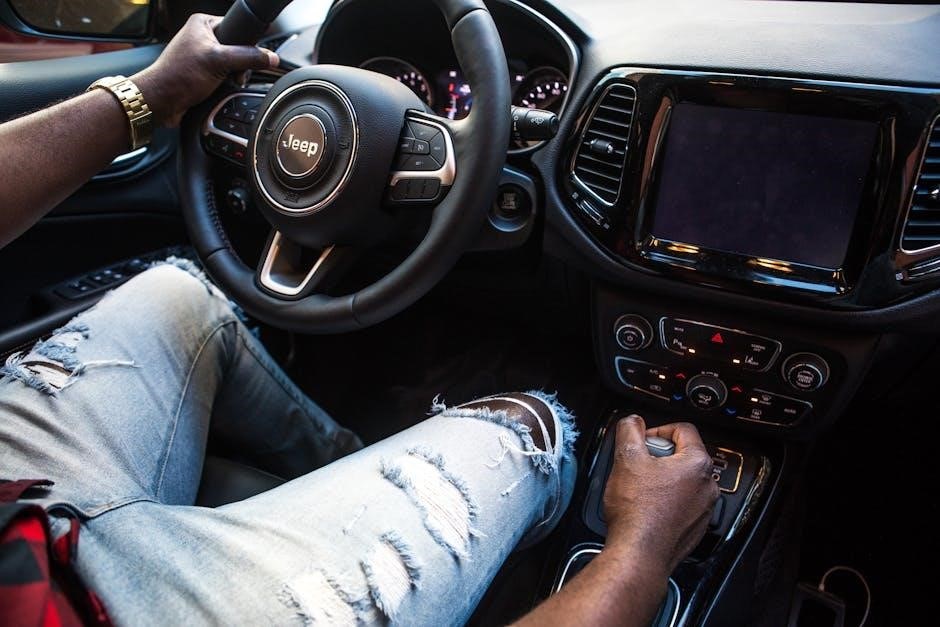
11.2 Avoiding Distractions While Driving
Minimize distractions while driving by properly mounting the DVR and adjusting settings before starting your journey. Avoid interacting with the device while driving, as it may divert your attention from the road. Use voice commands or automatic features when available and ensure the screen does not obstruct your view. Always prioritize safe driving practices to maintain road safety and reduce potential risks.
Warranty and Customer Support
The device is backed by a limited warranty covering manufacturing defects. For inquiries or issues, contact customer support via email or phone for assistance and troubleshooting.
12.1 Warranty Terms and Conditions
The Full HD 1080p Car DVR is covered by a limited warranty for one year from the date of purchase. This warranty covers manufacturing defects in materials and workmanship. Damage caused by misuse, accidents, or unauthorized modifications is not covered. For warranty claims, contact customer support with proof of purchase and a detailed description of the issue. Warranty terms may vary depending on the region and seller.
12.2 Contacting Customer Service
For any inquiries or issues, contact customer service via email at support@cardvr.com or call the toll-free number 1-800-XXX-XXXX. Visit the official website for live chat support. Include your order number, product model, and detailed issue description to expedite assistance. Customer service operates Monday to Friday, 9 AM to 5 PM EST, ensuring prompt resolution for warranty claims, technical support, and general inquiries.

Frequently Asked Questions (FAQs)
Common questions include improving video quality, enabling loop recording, and resolving Wi-Fi connectivity issues. Refer to the manual for troubleshooting steps and feature optimization tips.
13.1 General Usage Queries
Common questions include how to install the DVR, mount it on the windshield, and basic operation. Users often ask about switching modes, adjusting settings, and ensuring proper functionality during driving. Troubleshooting tips for initial setup and feature activation are also frequently requested to ensure a smooth user experience.
13.2 Technical and Compatibility Issues
Users often inquire about resolving technical issues like connectivity problems, GPS functionality, and compatibility with various smartphone models. Queries also address firmware updates, video quality optimization, and synchronization with rearview cameras. Ensuring the DVR works seamlessly with different devices and software is a common concern for many users seeking technical support.
This Full HD 1080p Car DVR is a reliable and versatile device for capturing high-quality video and photos while driving, ensuring safety and peace of mind on the road.
14.1 Final Tips for Optimal Use
For optimal performance, regularly clean the lens, update firmware, and format the memory card. Ensure proper mounting and power supply. Use the GPS for accurate tracking and enable motion detection for added security. Transfer files periodically to avoid storage issues and refer to the manual for troubleshooting common problems. Always follow safety guidelines while driving.